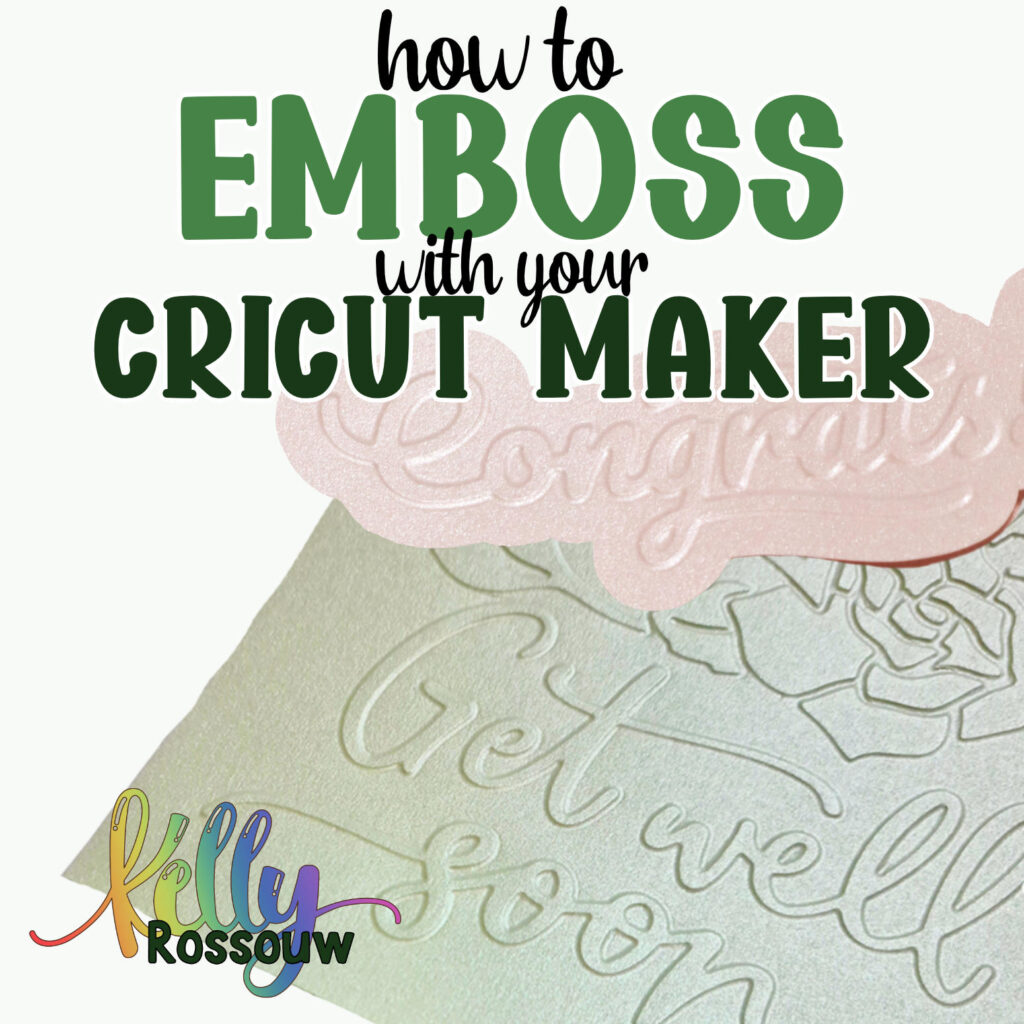
Learning to emboss with the Cricut Maker may seem intimidating, and it was for me too in the beginning! But I have developed this method with lots of testing, and is the easiest route for the BEST Embossed Cricut projects. This method uses the Cricut Maker, but I do have another method for the Cricut Explore if you prefer.
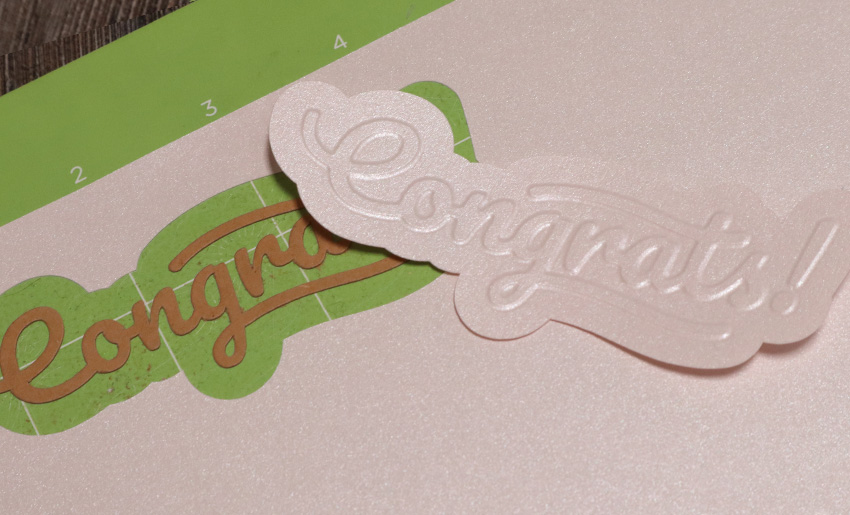
Embossing with your Cricut Maker using the Debossing tool on the Quick Swap housing. This method creates a stencil out of a thick cardstock first to enhance the emboss. The Debossing tool then outlines the stencil to create your embossed design.
It really is as simple as it sounds, but there are a few tips I have learned along the way that I want to share with you. These tips are aimed at getting the best results possible for your projects.
Follow Along on YouTube
This tutorial is also detailed on my YouTube channel, so you can follow along with the video too!
What you will learn in this tutorial:
- Which materials are best suited for Embossing projects
- How to set up your Embossing stencil
- How to Emboss with the Cricut Maker
What materials you will need to learn how to Emboss with your Cricut Maker:
- Cricut Maker or Maker 3
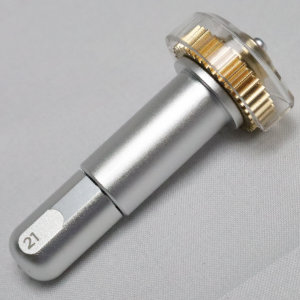
- QuickSwap Housing with Debossing Tip
- Standard grip mat
- The material you want to emboss (Curious Metallic paper, Light cardstock, medium cardstock, various other papers)
- The material to use for a stencil (recommended 300 gsm Kraft board or similar for best results, but medium 216 gsm cardstock will give you decent results)
Note: It is important to use the right type of materials for your project. For your stencil, a thinner material will mean a softer deboss. For your embossed page, it needs to be thick enough to withstand the pressure of the tip. A thicker embossed page will not get as good of a result as others.
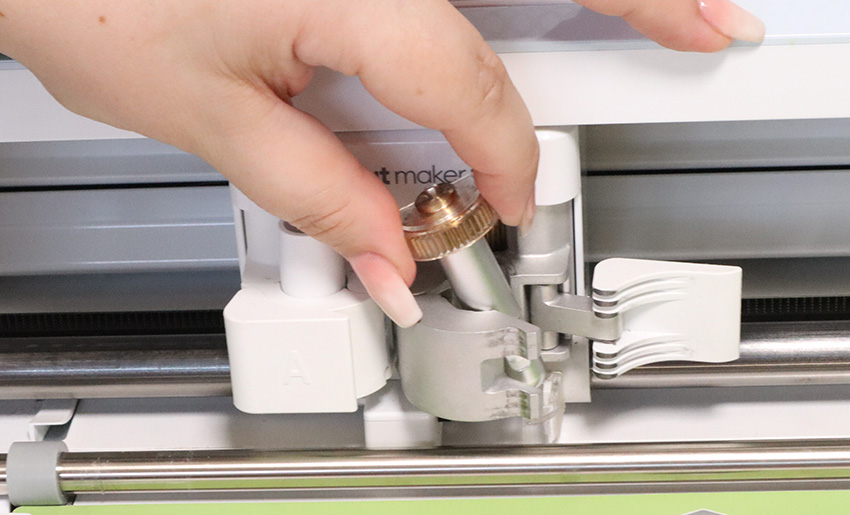
To deboss or emboss on your Cricut Maker, you will need to use the adaptive tool system which is called the Quick Swap Housing, and the appropriate cutting tip, which is the Debossing Tip. The Quick Swap Housing has many different tips, and you only need to buy one of them, as you can easily press the silver button at the top to release the tip and change it out for another one!
Setting up your Embossing Stencil
Step 1
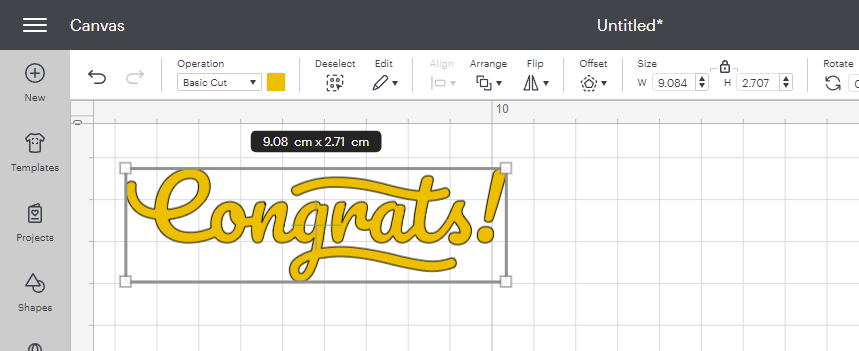
Select the design you want to deboss or emboss and load it into Cricut Design Space.
Remember that with a super intricate design, you will lose some small details, so try not to make it too intricate!
Step 2
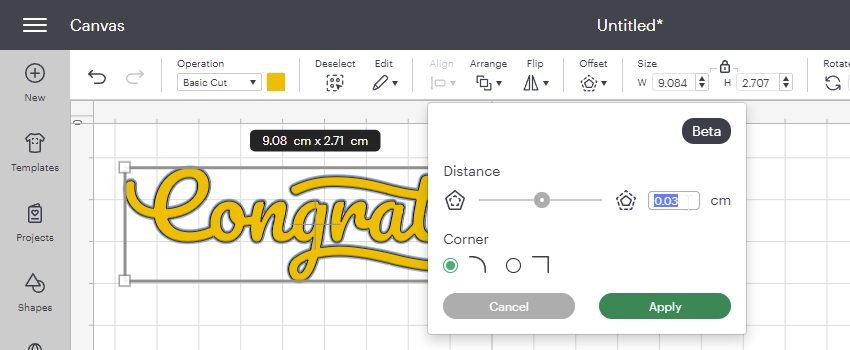
Once you have resized your design to the size you want it to be, click on the Offset button, and change the number in the field to 0.02 or 0.03 – the number you choose may depend on how intricate the design is that you have chosen. A more intricate design will need a lower offset.
Once you are happy with the offset, click Apply.
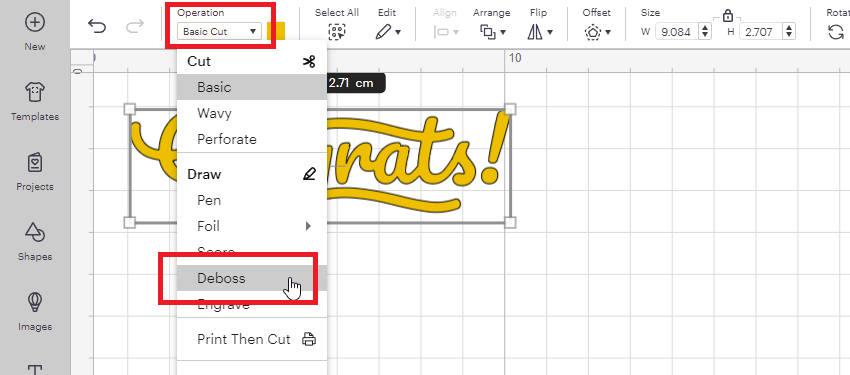
Step 3
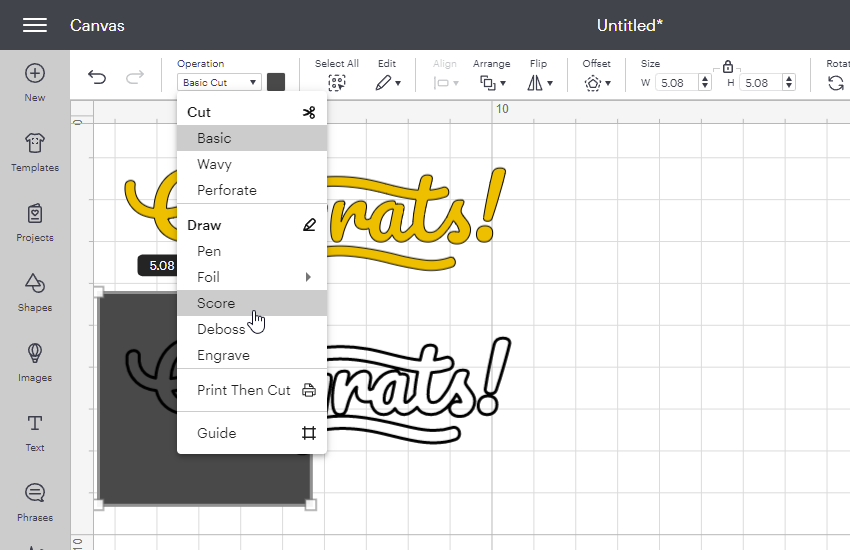
Next we are going to click on “Operation” in the top left hand side of the screen, and change the operation of our new offset layer to “Deboss“
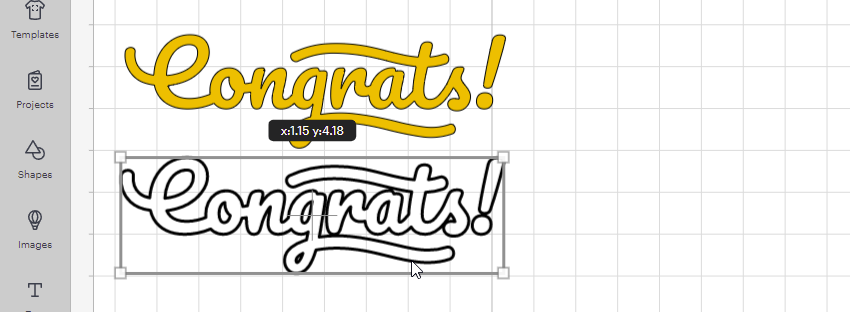
Step 4
You should now have two layers, and you can separate them, as we will be working with them separately.
Step 5
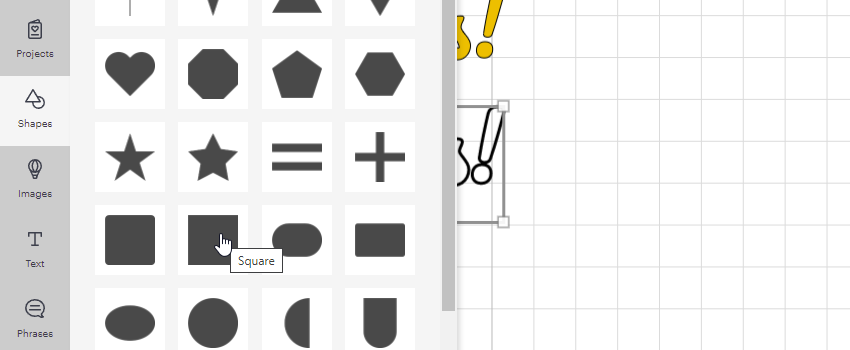
We need a way to keep both elements in the same place for our stencil layer (the basic cut layer), and then when we deboss over the stencil. To do this, I use a simple square that is the same size for both elements. Click on Shapes on the left hand side of the screen, and add in a Square.
Step 6
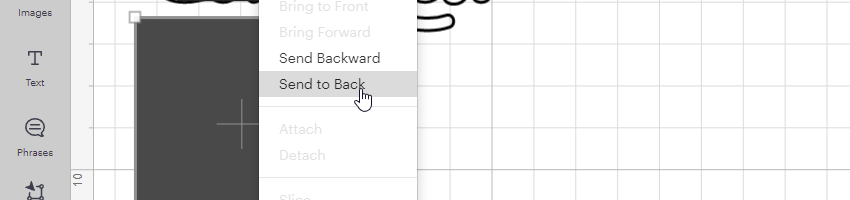
Right click on the shape and click Send to Back.
Step 7
In between the sizing option there is a padlock where you can unlock the proportions to change the height and the width of the shape to be different. Click on it so that you can see the padlock “unlock” on the icon.
Step 8
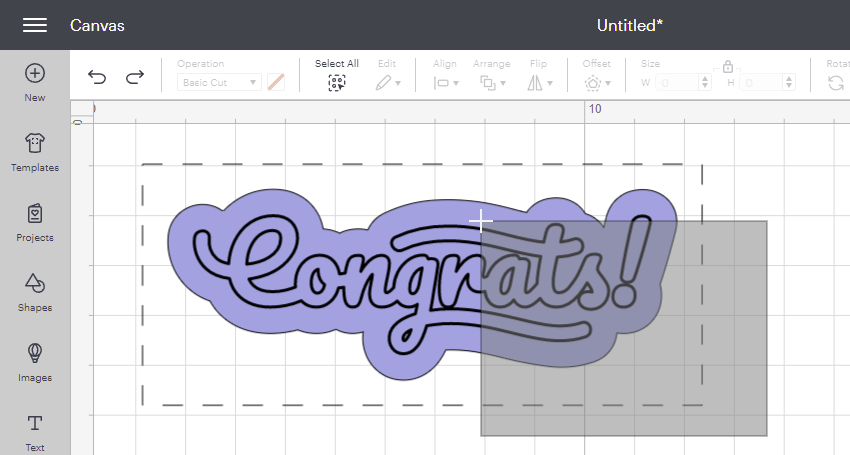
Click on any one of the corners and drag the box so that the design fits comfortably within the box. You want to leave a bit of space around the outside of the design – around half an inch/1.5cm or so.
Step 9
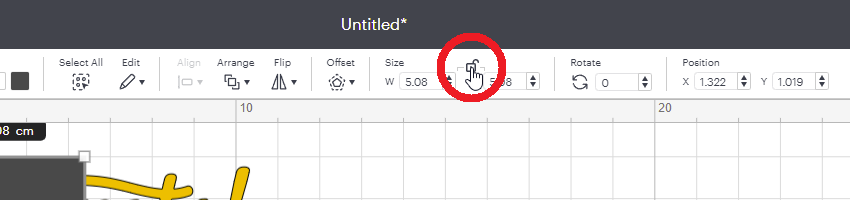
We dont actually want it to cut, it just needs to serve as something that allows us to make sure both elements are in the same spot on the mat, so we change the operation of the box! Click on Operation, and change the line type to Score. This also helps us see all the elements easily.
Step 10
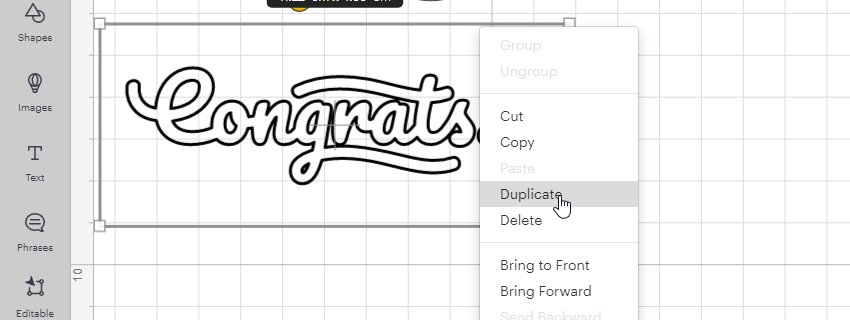
Right click on the box, and duplicate the shape, so we have two shapes exactly the same size – this makes lining up the debossing stencil easier for a later step. Move the new box to the original design layer.
Step 11
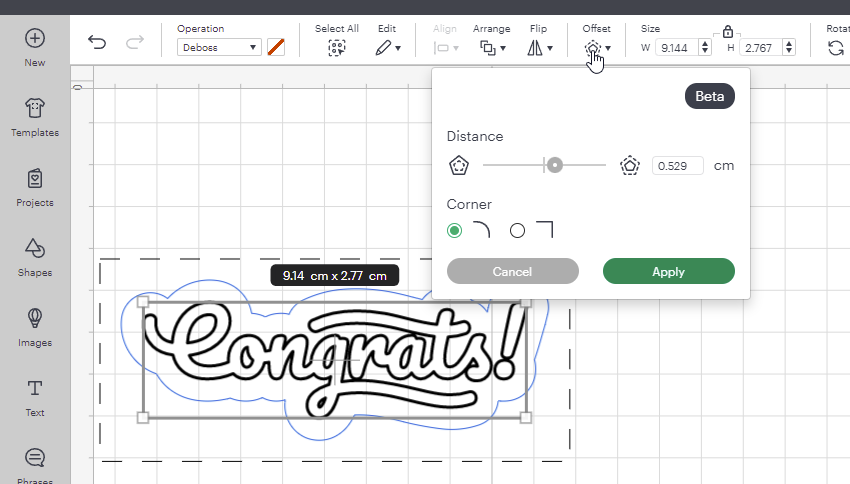
If you want to cut out the debossed item from the page, you can do so by adding a shape or an offset. Select the layer you have set to deboss, and add an offset. Slide the circle to an offset you like in the preview, and click Apply.
Step 12
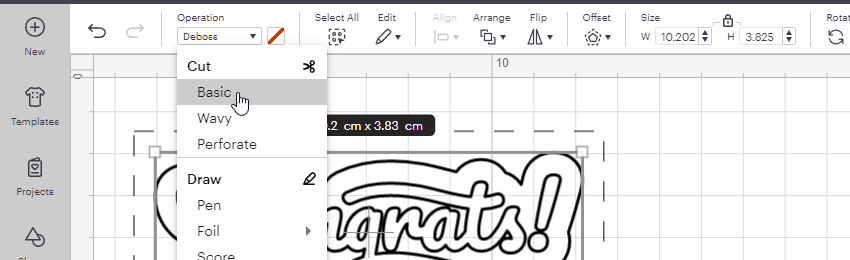
Make sure to change the Operation type to Basic Cut so that the Cricut knows how to cut the embossed product out!
Step 13
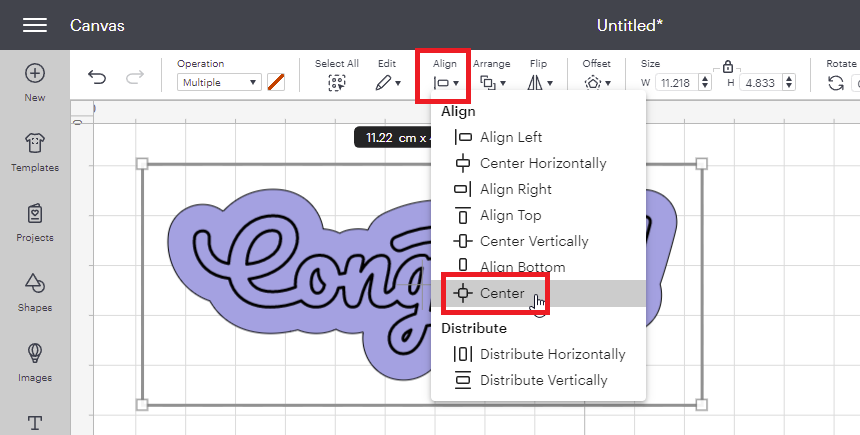
Click and drag on the canvas to select both layers.
Step 14
With both layers selected, click Align, and Center. Repeat this step with your original design and the
Step 15
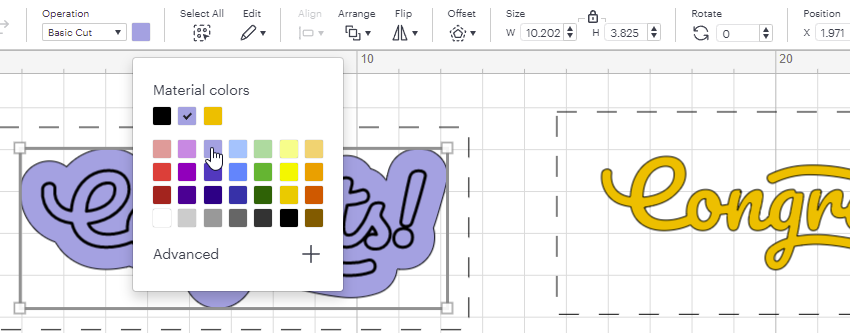
Make sure to change the colour of the layer to anything other than the colour of the other item we have on the canvas!
Step 16
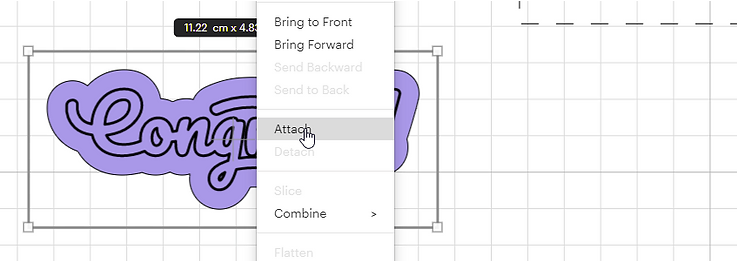
Select and attach all of these layers by right clicking and clicking Attach.
Embossing your design on your Cricut Maker
Step 1
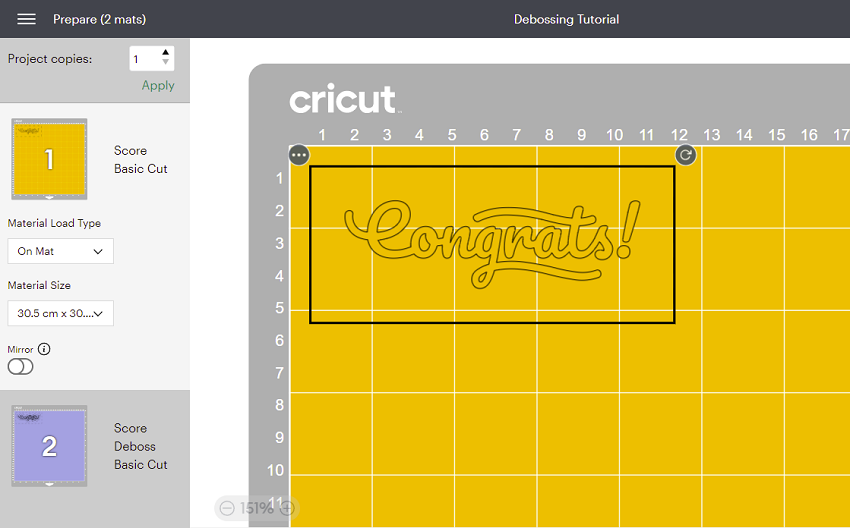
Once you have clicked Make, be sure you are cutting the mat that has the “Score” and “Basic Cut” operations only. Click continue in the bottom right corner.
Step 2
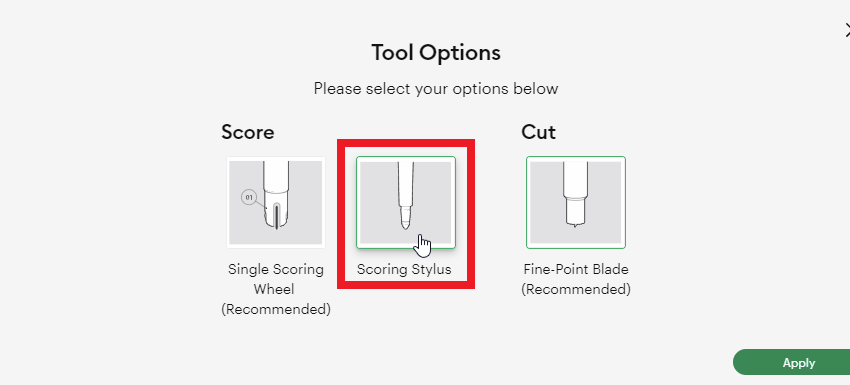
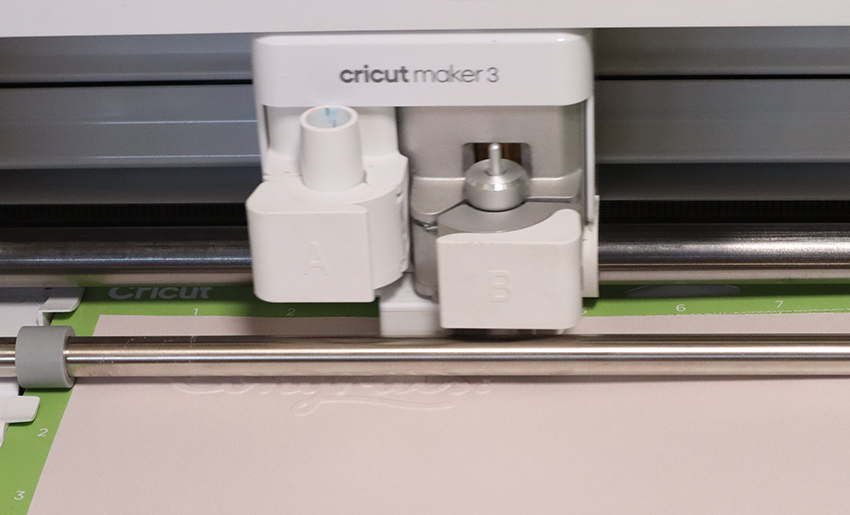
Once you have chosen the paper type you are cutting first, (I like to use Kraft Board for my stencil layer), you will need to click on Edit Tools. to change the Double Scoring wheel.

Step 3
Select the Scoring Stylus – even if you dont have one! We will not be loading anything into the A slot, and we will not use the Scoring Stylus – this will purely be a fake tool cut that helps us line up our project.
Step 4
Load the media onto your Standard Grip mat, and cut it in the machine.
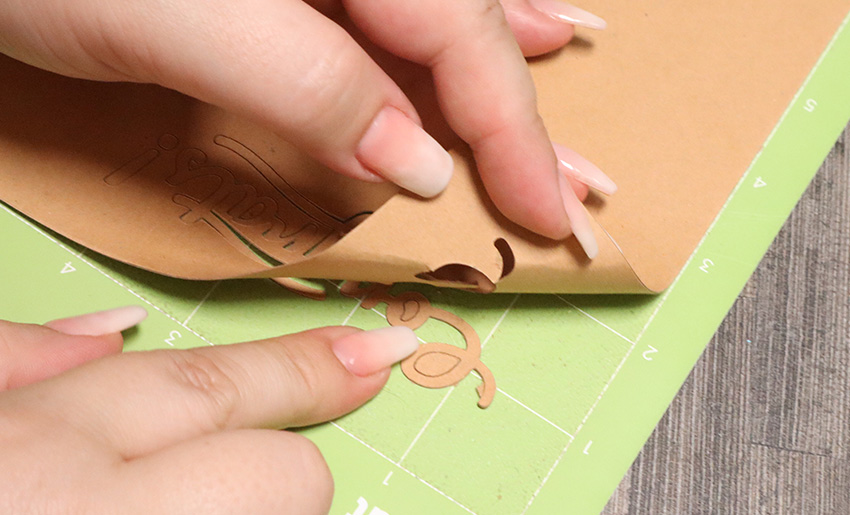
Step 5
Once the cut is done, unload the mat and gently remove the negative of your design, so that the design itself is left on the mat.
Step 6
Place the paper you want to emboss onto the mat carefully over the design. I like to use a light to medium cardstock – anything too heavy will not deboss properly with this method.

Step 7
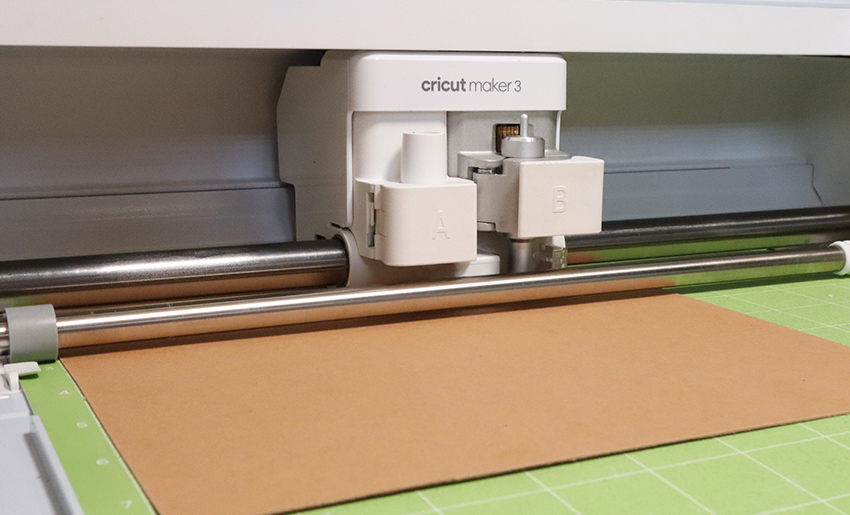
Load the mat into your machine, and you will need to load your QuickSwap housing with the Debossing tip into your machine too.
Step 8
Once the debossing action is complete, switch to the fine point blade, resume the cut, and unload when finished.
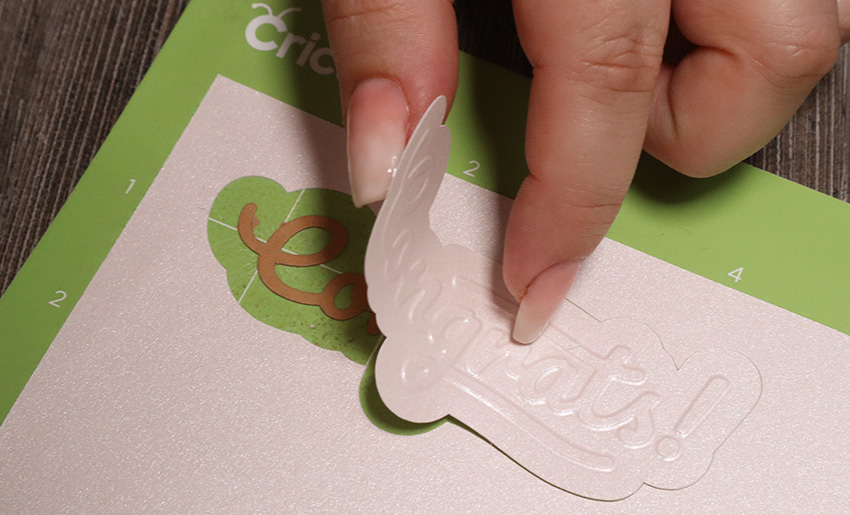
Step 9
Carefully remove your debossed page by very gently lifting it off the mat (if you are very careful – you can also flip the mat over and be sure to leave the stencil on the mat if you want to use it again!).
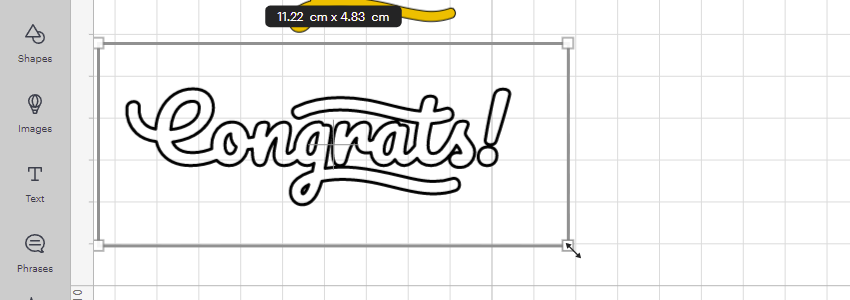
Congrats!
Well done for making your way through this tutorial and I hope you have the most amazing debossed project!