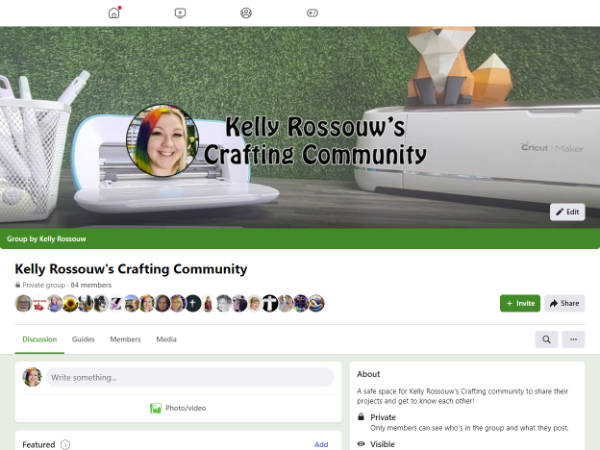
Getting started with your Cricut for the first time is intimidating. I created this new Cricut user supply guide to help show you which supplies to buy so you don't get overwhelmed and unable to start your first few projects. I have been in your shoes exactly, and I want to help you learn from my experience!
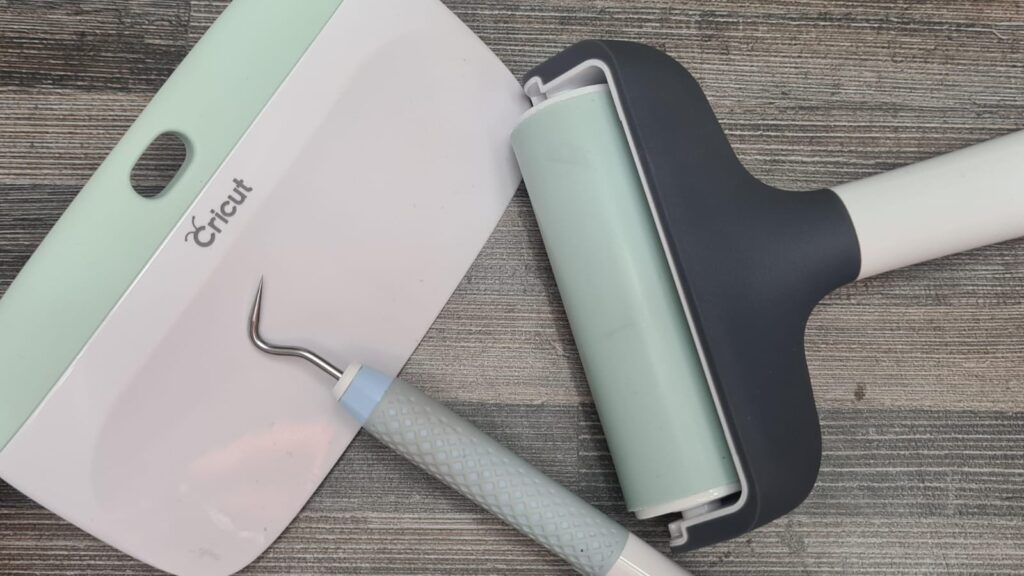
Basic toolsets are the best thing to buy when starting your Cricut journey. They have a combination of tools that cover most beginner needs. The weeding tool, a scraper, and an additional brayer are more than enough to get started.
You don’t need to buy too many tools to get started. In fact, I advise against it for a few key reasons.
Jump to a section:
- Basic Cricut supplies you need
- Materials you need for your first Cricut projects
- Cutting Mats needed
- Machine Specific items
What basic supplies do I need with my Cricut?
There is a wide variety of tools in this craft, and it is exciting but can be overwhelming. Your basic tools come in many different shapes and forms. Most of the time there is a basic toolkit, or starter toolkit, that will contain a few of the key items you need all in one. This way you don’t have to spend lots of money upfront to get the tools you need.
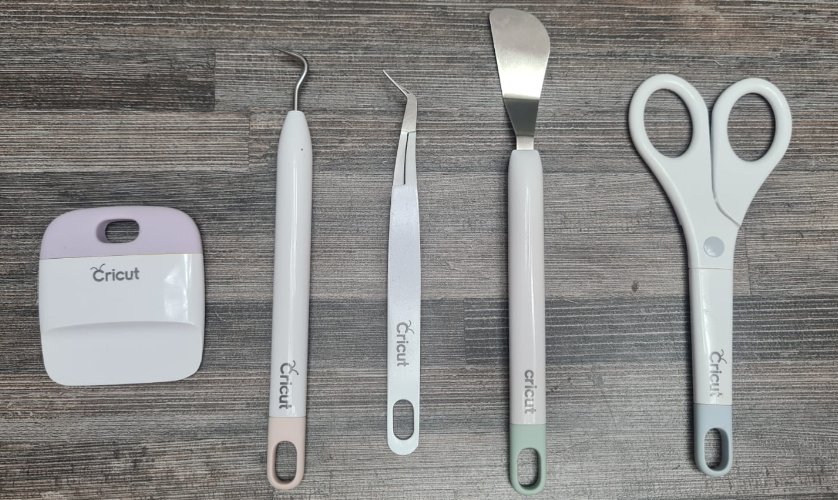
The basic toolset will have your weeding tool, and scraper, as well as a few other tools you might need like scissors, a spatula, and reverse tweezers. I don’t use the scraper, or spatula at all, and only rarely use the reverse tweezers.
Other handheld tools like the TrueControl weeding kit, XL scraper, and brayer will help you with the three major Cricut craft project types: sticker vinyl, heat transfer vinyl (HTV), or cardstock is where most people start.
True Control Weeding Kit
TrueControl weeding kit has several different attachments that are interchangeable. This means you get four tools in one. These extra tips you can easily swap out by unlocking the bottom of the tool, and pressing it in to pop out the tip. Easily pop in one of the other tips – and you have a four-in-one tool that helps you save money in the beginning!

XL Scraper
The scraper will help you ease out any bubbles from the transfer tape on the sticker vinyl. as well as when you place the decal onto your blank (water bottle, cellphone cover, etc). I also use it for my cardstock projects to clean off the pieces left behind after my project has been cut.
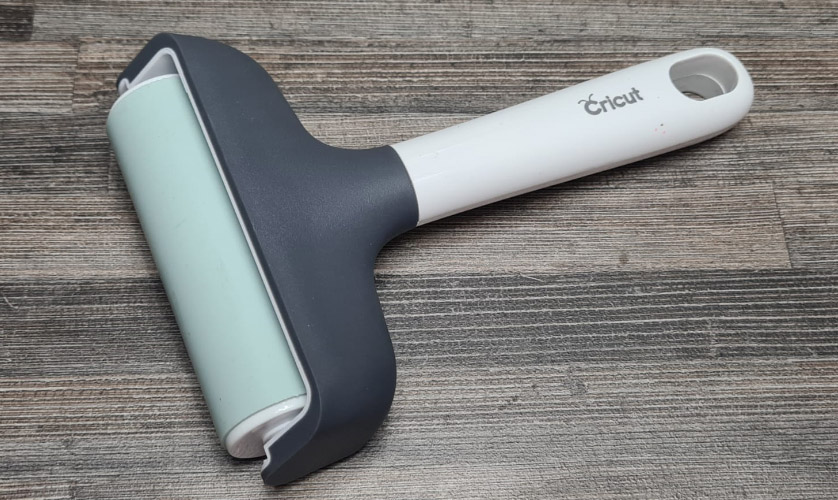
Brayer
The brayer is my personal favorite as it helps stick the material to your cutting mat. Not only does this mean fewer failed paper projects, but more accurate cuts on your vinyl too!
There are many other fun tools you can buy as part of your basic supplies list for your Cricut when you start. I recommend sticking to the basics until you get the hang of your machine.
Buying too many things in the beginning overwhelms me so much, so I would imagine it might overwhelm you too. Unless you find something on a massive sale that you can’t pass up – only buy what you need. You can still make hundreds of projects with the basic tools only.
What materials will I need?
There are a few different types of material you can choose for your first few projects. I would suggest picking only one until you have the hang of how the machine works. The three usual suspects are:
Cardstock or sticker vinyl would be my suggestions for your first few projects, as they have fewer steps to completion, and require less extra technology up-front.
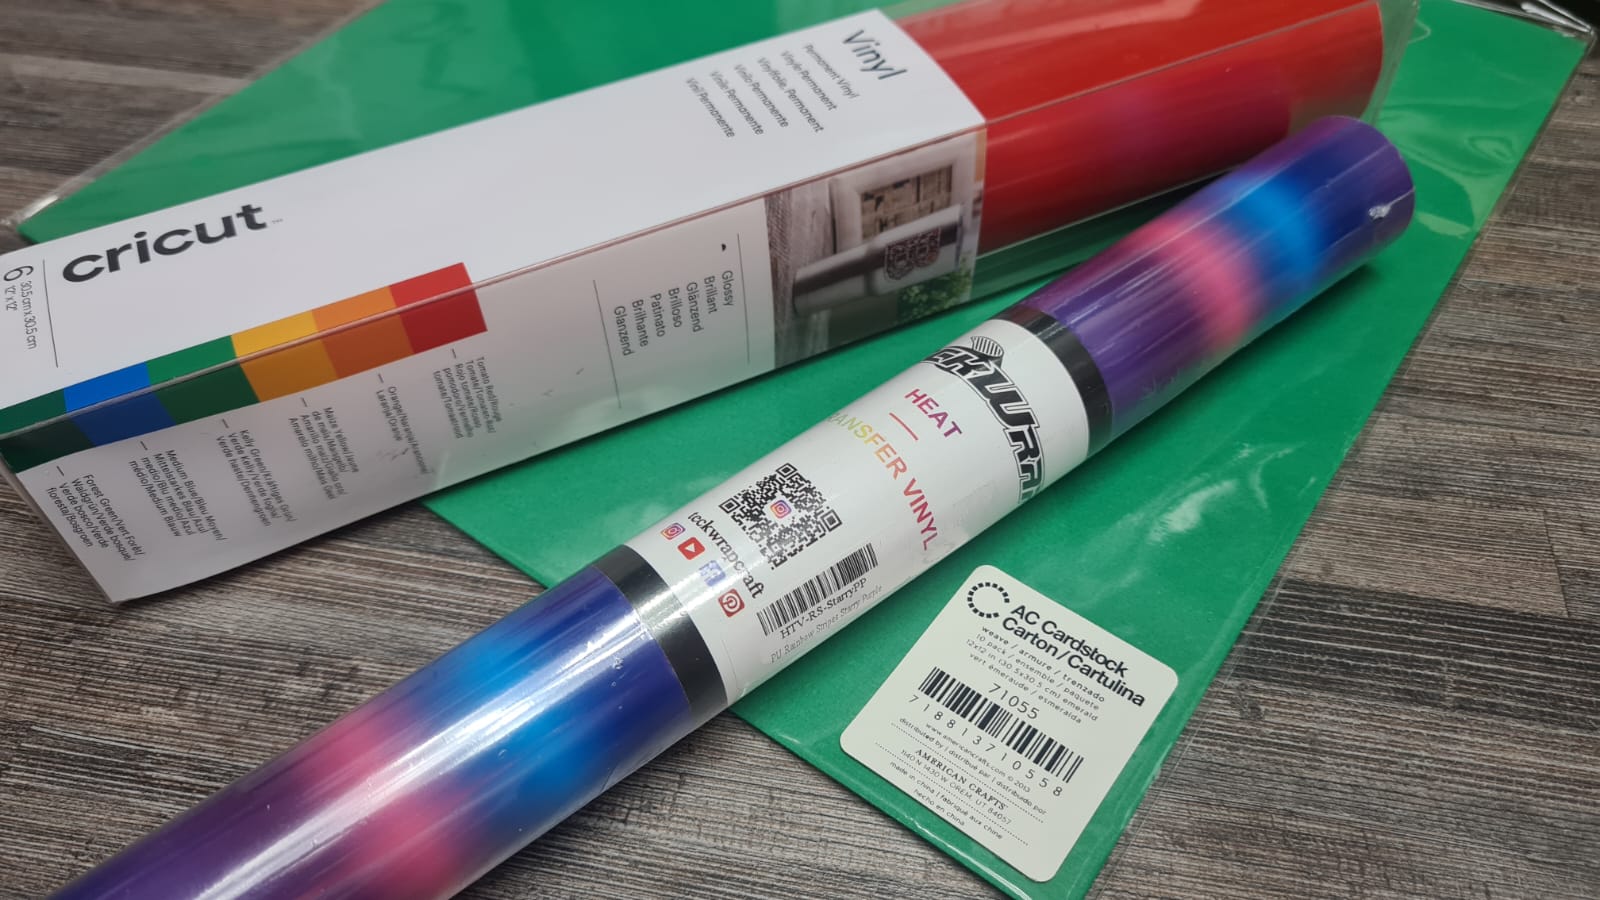
If you have chosen cardstock, many brands (like AC Cardstock) offer bulk packs of 216 gsm/80lb cardstock in multiple colours, for under R600/$30. These packs allow you to not worry too much about wasting materials in the beginning – as you are more likely to make mistakes.
Vinyl is also often sold in a variety pack, with a few different coloured sheets in each pack. You can use these for different names on bottles, or even as a backup if you make a mistake on another sheet.
Buying off-brand vinyl like Teckwrap, Grafitak, Oracal, or HTVRont will save you a fair bit of money – and many prefer these brands to your Cricut vinyl. Don’t forget to add some transfer tape if you have chosen the adhesive vinyl route!
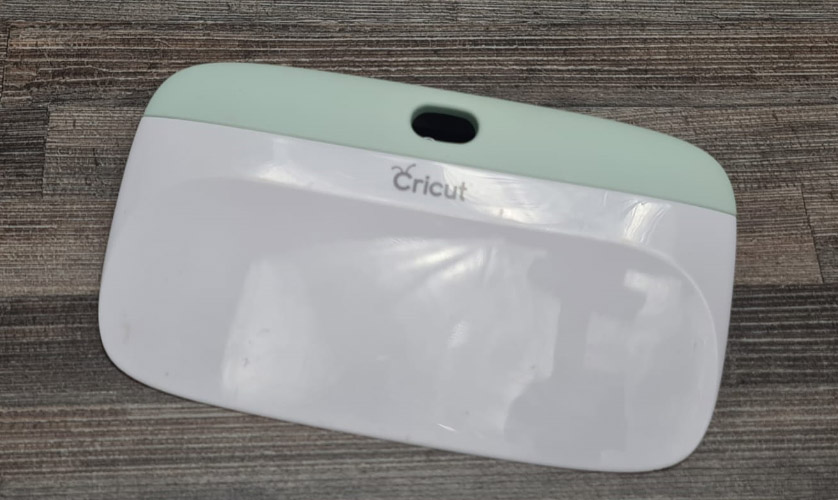
Will I need a cutting mat?
You will most likely need a cutting mat for your first few projects. If you want to try cardstock or regular vinyl, you will need to secure it onto the sticky cutting mat in order for the machine to accurately cut what you have told it to.
If you received one in your machine box (with the Joy, Explore Air 2, or Maker machines), you won’t need to buy one separately. If you have an Explore 3, or Maker 3 – you will need to buy one, as these machines promote the use of Smart materials (materials that don’t require a cutting mat).
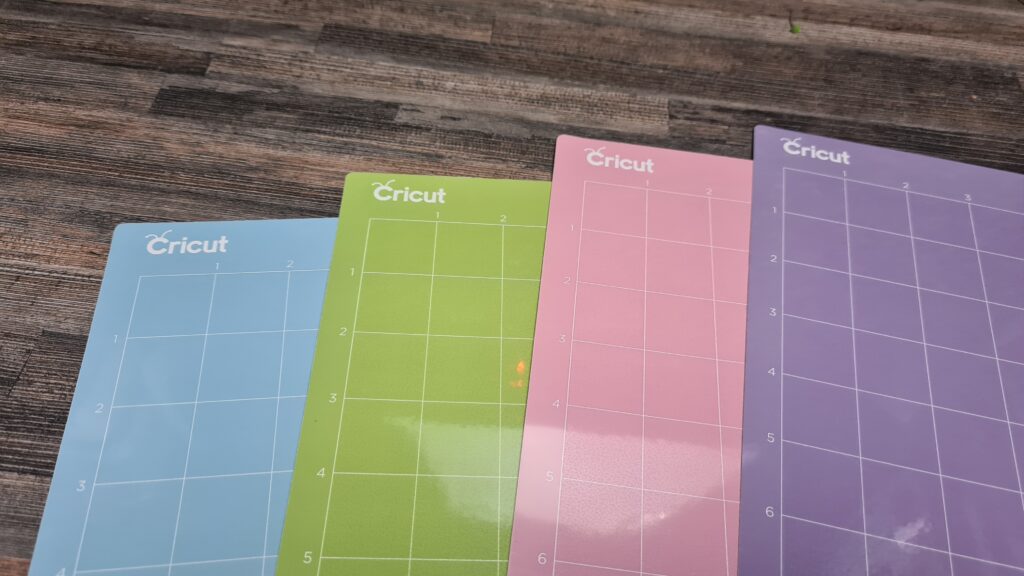
There are a few different types of cutting mats, that have different strength adhesive on them for the different materials you are going to use.
- Blue – Light grip
- This is used for your more delicate materials like crepe paper, and copy paper, but can also be used for light cardstock too.
- Green – Standard grip
- Used for your general materials, like adhesive vinyl, HTV, cardstock, and craft foam
- Purple – Strong grip
- Used for your thicker, harder materials and for use with stronger tools, and materials like faux leather, heavy chipboard, and tooling leather.
- Pink – Fabric
- Light grip strength, but this mat is used for materials like fabric. It is specially designed to withstand the pressure of the rotary blades (used by the Maker range to cut material)
When using a cutting mat, always flip the mat over when removing your material, and bend the mat away from the vinyl/cardstock. This reduces the risk of curling your material after it is cut. The mats can bend quite a bit, so don’t be too shy!

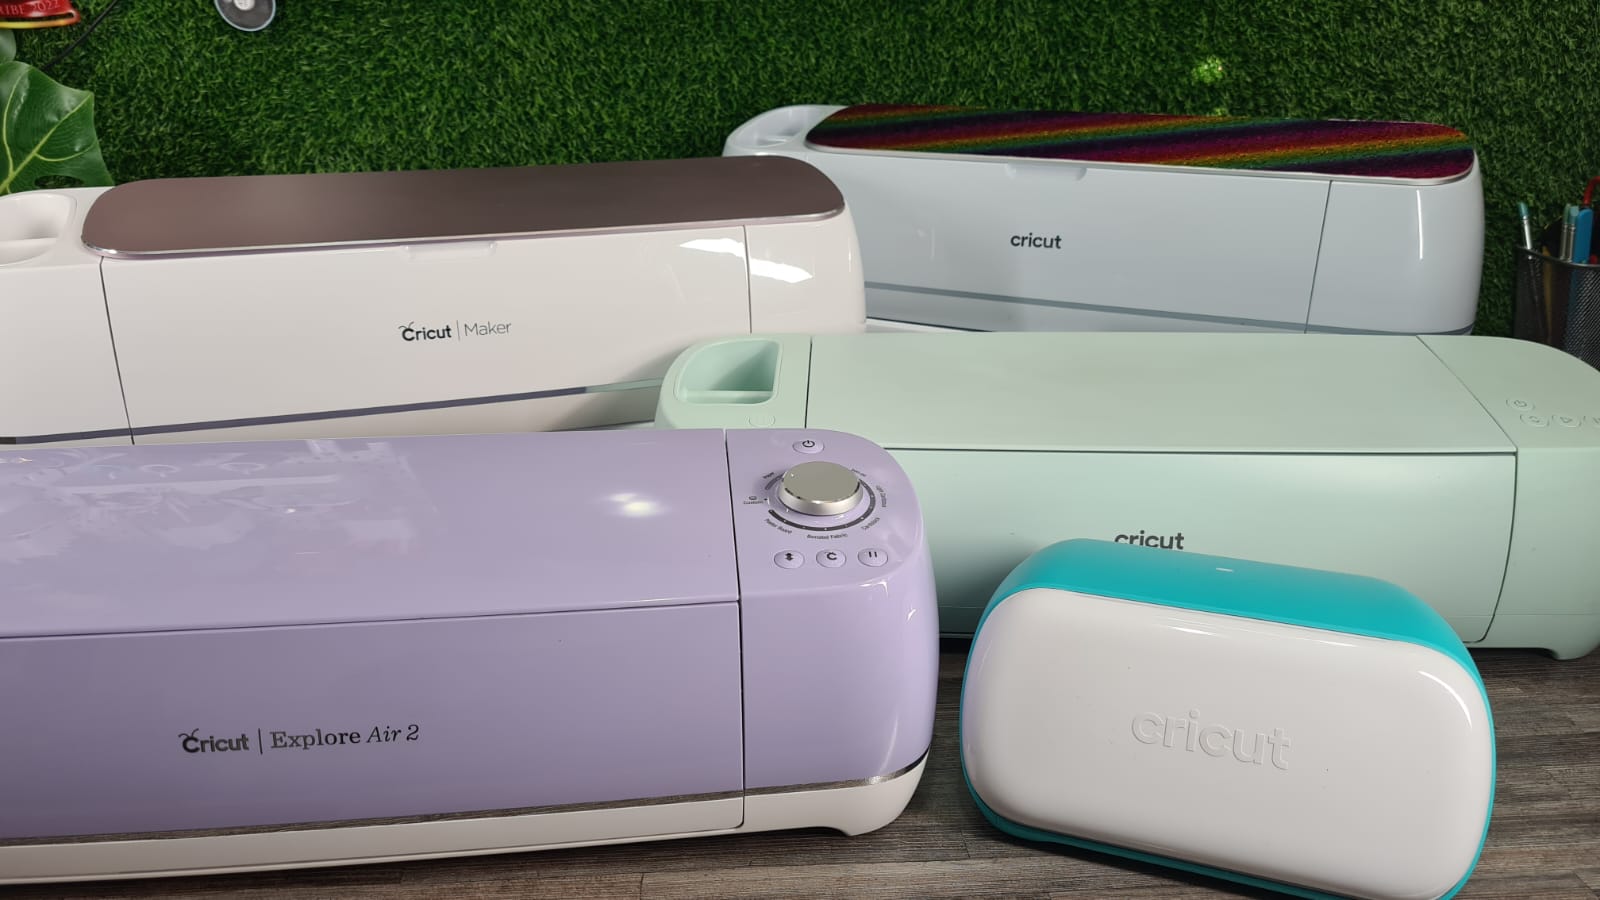
Machine specific*
Each machine has a specific range of products that are suitable for the machines in those ranges. These ranges are broken down into three main categories, with some machines appearing in each:
- Machine size
- This refers to the cutting width of the machines – the Joy and Joy Xtra can only cut up to 6.5” and 8.5” wide respectively. While the Explore and Maker machines can cut 12” materials.
- Machine range
- The machines are broken up into three main ranges: Joy, Explore, and Maker, and each machine has different capabilities, tools, and functions.
- Smart machines
- The Joy range, Explore 3 and Maker 3 can more easily make use of Smart materials (materials not requiring a cutting mat)
The packaging of the product should tell you what range the tool is suited for, with the exception of older packaged items. For example, the deep point blade and some of the older pen packages state the pens are for the Explore machines. However, any pens or tools that the Explore can use, can be used in the Maker range machines as well.
*These categories exclude the Cricut Venture.
If you have any questions about anything above – leave me a comment and I will do my best to help you out!