

Learn How to Emboss with your Cricut Explore
You can create beautiful embossed cardstock with your Cricut Explore machine using tools you may already have in your craft room. This step-by-step Cricut embossing tutorial will help you set up the design, create a reusable stencil, and achieve a crisp, raised finish without a separate embossing machine or tool.
To emboss with a Cricut Explore, cut a stencil out of a thicker 300gsm cardstock, place thinner cardstock over it, and use the Bold Foil Transfer Tip to press the paper around the stencil. Finish by cutting the project’s outer shape with the Fine-Point Blade.
There are a few important setup details that will make your embossed design cleaner and help everything line up correctly. Follow the steps below, and don’t stress if the process feels unusual at first. It will make much more sense once you begin assembling the layers.
What you Will learn from this Tutorial:
Follow along on YouTube:
Supplies
- Cricut Explore machine
- Foil Transfer Tool with the Bold Tip
- Scoring Stylus, as an alternative tool
- Fine-Point Blade
- Green StandardGrip Machine Mat
- Cricut Kraft Board or 300gsm cardstock
- 120gsm to 150gsm cardstock or pearl paper
- Brayer
- Painter’s tape, optional
- Weeding Tool
- Paper trimmer
- Cricut Design Space
Step 1: Set Up Your Design for Embossing
1.1. Choose a Simple Embossing Design
Choose a bold design with smooth curves and clearly defined shapes. Simple images work better for this Cricut Explore embossing method because the thick stencil material and Bold Foil Transfer Tip cannot follow very small details easily.
Avoid designs with lots of tiny corners, narrow spaces, or sharp turns. You may lose some of those fine details during the embossing process.

1.2. Resize the Design
Add your chosen image to the Canvas in Cricut Design Space and resize it before making any other changes.
The following layers will be created around this design, so setting the final size now will prevent alignment problems later.
1.3. Add Two Alignment Squares
Add two squares to the Canvas and make sure they are exactly the same size.
Place the design inside the squares, then use the Align tool to centre the two squares. These squares will act as positioning guides so the stencil and finished cardstock remain in the same place on the mat.
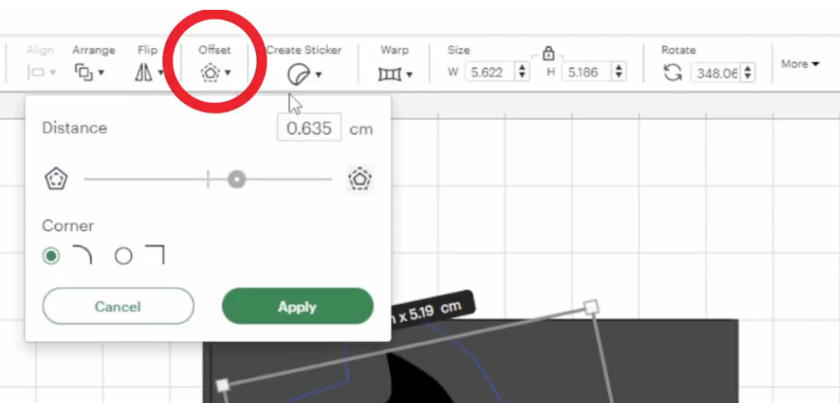
1.4: Create a Small Offset
Select the main design and open the Offset tool.
Create a very small offset of approximately 0.03cm, or around 0.01 inches, then select Apply.
This small space allows the Foil Transfer Tip to press beside the stencil instead of directly against its edge. It works a little like pressing wrapping paper around the edge of a gift box to create a crisp fold.
1.5: Add the Finished Project Shape
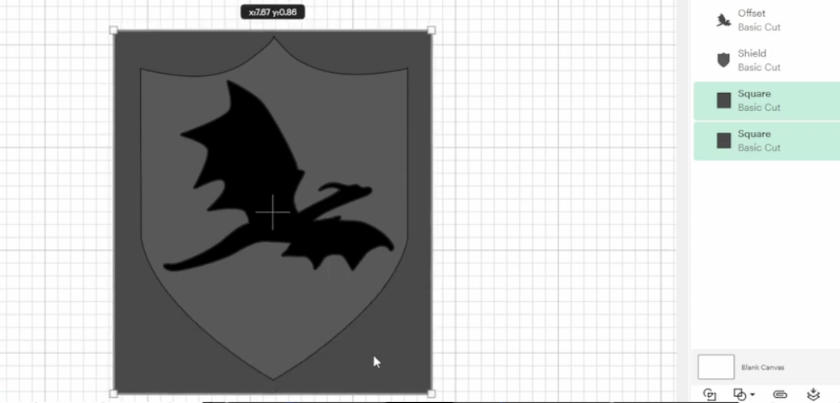
Add the shape you would like to use around the outside of your embossed design. This could be a shield, circle, square, card panel, or another simple shape.
Resize it so the complete design and its small offset fit comfortably inside. Make sure the alignment square also fits around the full outer shape.
Step 2: Prepare your design for Embossing
2.1. Change the Square to a Score Operation
Select one of the alignment squares.
Open the Operation menu and change it from Basic Cut to Score.
This score layer will be used only as an alignment placeholder. You will not actually load a Scoring Stylus when the machine reaches this part of the project.

2.4. Change the Offset to Foil
Select the small offset layer around the design.
Change its Operation from Basic Cut to Foil, then choose the Bold Foil Tip.
The foil line will become the embossed outline. You are not adding foil to the project. Instead, the tool will press the cardstock down beside the stencil to create the raised effect.
2.3. Attach the Finished Project Layers
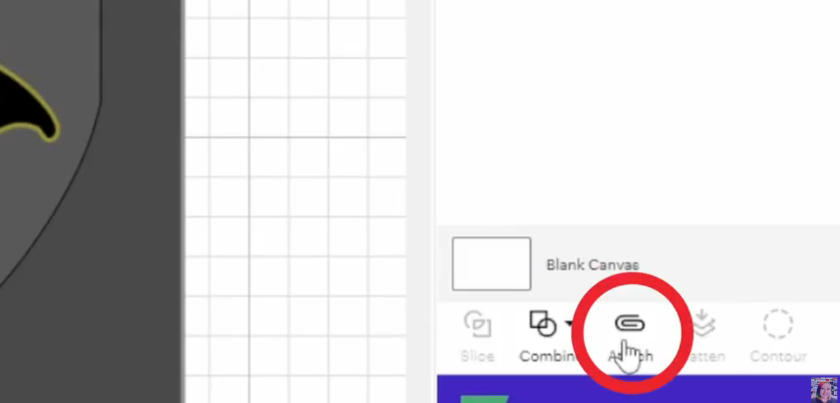
Select the score square, the foil offset, and the outer project shape.
Attach them together by right-clicking then clicking attach, or click attach in the bottom-right corner so these layers stay together when the project is sent to the mat.
This is your Project layer, and will be cut second.
Move the attached group to the side, and you should see the dashed score square, the outer cut shape, and the foil outline move together.
2.4. Attach the Stencil Layers
Select the remaining alignment square and the original design.
Choose Attach to keep these two Basic Cut layers in position.
This is your Stencil Layer, and will be cut first.
This group will be cut from the thick Kraft Board or 300gsm cardstock and will become your embossing stencil.
2.5. Give the Two Mats Different Colours
Change the stencil group and finished project group to different colours.
The colours do not need to match your actual materials. They simply tell Cricut Design Space to place the groups on separate mats.
Make sure the stencil mat is cut first. The stencil must remain on the machine mat before you can emboss the finished cardstock.

2.6. Save and Make the Project
Save your Cricut Design Space project before continuing.
Click Make to enter the preview screen.
Step 3: Prepare your Project to be cut
3.1. Save and Make the Project
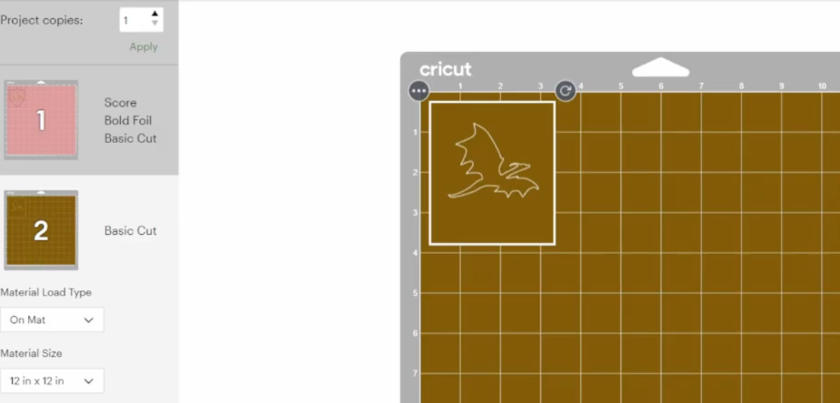
Choose the mat containing the stencil layer first, even if Cricut Design Space displays it as the second mat.
This layer will only contain the solid square cut layer, and the shape you chose to have on your end product. It should only have the cut function listed on the side.
Click Continue, and if you are using Kraft board (300gsm cardstock, select Kraft Board or the closest suitable setting for your 300gsm cardstock.
3.2. Place the Stencil Material on the Mat
Place the Kraft Board or 300gsm cardstock onto a sticky StandardGrip Machine Mat.
Use a brayer to press the entire piece firmly onto the mat. A strong hold is important because the stencil needs to remain attached during the next stage and may be reused several times.
Painter’s tape can be added around the outside edges for extra security, but keep it away from the cutting area.
3.3. Load the Mat Carefully
Before loading the mat, gently hold it towards either the left or right side of the machine.
There can be a very small amount of movement between the mat guides. Holding the mat against the same side each time improves your chances of keeping the stencil and embossing layers more accurately aligned.
It does not matter which side you choose, as long as you use the same side every time the mat is loaded.

3.4. Cut the Stencil
Install the Fine-Point Blade in Clamp B, load the mat, and start the cut.
When the machine finishes, do not unload the mat immediately. Lift a small corner of the cut material and check that the blade has cut all the way through.
Run another cutting pass before unloading if the material has not cut completely.
3.5. Weed the Stencil on the Mat
Unload the mat and carefully remove the unwanted sections of the design.
Leave the actual stencil attached to the mat. The thick cardstock surrounding the cut design needs to remain securely in place.
When using a Weeding Tool, press it into the cardstock and lift the material upwards. Avoid dragging the tool across the mat because this can scratch or gouge the adhesive surface.

3.6. Trim the Embossing Cardstock
Cut a piece of 120gsm to 150gsm cardstock or pearl paper that will cover the stencil and fit inside the alignment area.
Lighter weight cardstock will often give you a crisper result, but may tear if the paper is too thin. A heavier cardstock may not show the emboss as crisply, but is less likely to tear.
Test out different weight cardstocks to find the right balance for you and your project.

3.7. Place the Cardstock Over the Stencil
Place the embossing cardstock directly over the stencil while the stencil is still attached to the mat.
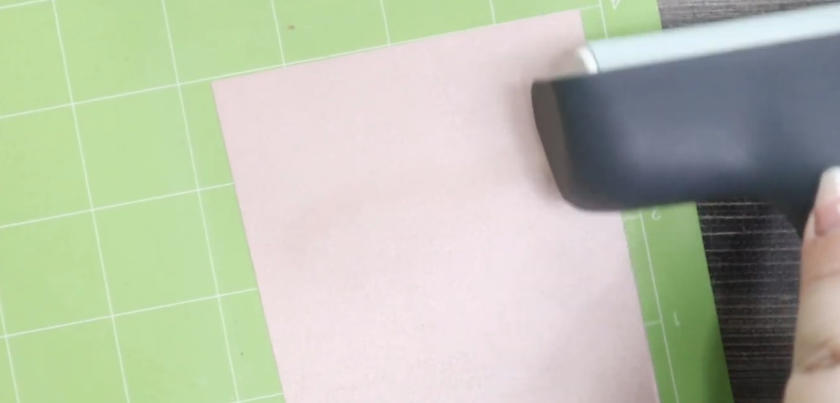
Use your brayer to press the paper down firmly. Go over the design gently, then pay particular attention to the outer edges so the cardstock does not move while the machine is working.
Step 4: Cutting and Embossing Your Design
4.1. Prepare the Tools for Embossing
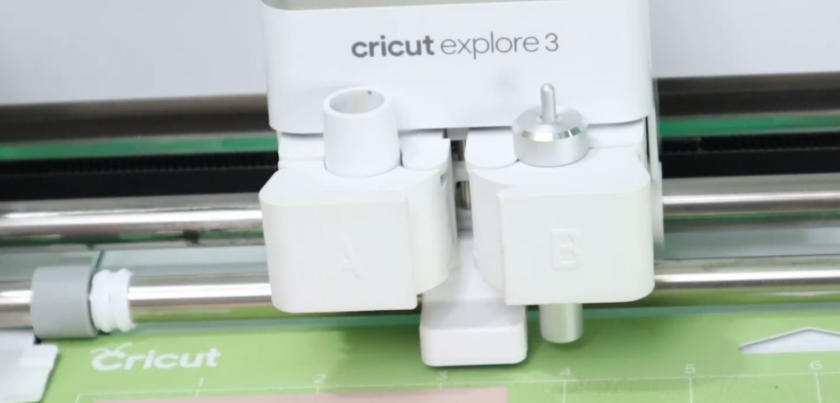
Leave Clamp A empty, even when Cricut Design Space asks you to insert the Scoring Stylus.
The score operation is only being used as a positioning guide. No actual score line needs to be made.
Install the Foil Transfer Tool with the Bold Tip in Clamp B. The Bold Tip has three small lines on it and creates the strongest impression for this embossing technique.
4.2. Load the Mat in the Same Position
Load the mat while gently holding it against the same side of the machine that you used for the stencil cut.
This repeated positioning gives the design the best chance of lining up over the stencil.
Start the project. Clamp A will move as though it is scoring, but because it is empty, no marks will be made.
4.3. Run the Foil Operation Without Foil
When the machine reaches the Foil step, do not add any Foil Transfer Sheets.
Continue with the project so the Bold Foil Transfer Tip traces the small offset around the design.
As the tool follows the line, it presses the cardstock down beside the thick stencil underneath. This creates the crisp embossed edge.
4.4. Replace the Foil Tool With the Fine-Point Blade
When Cricut Design Space asks you to remove the foil and install the blade, simply remove the Foil Transfer Tool.
Place the Fine-Point Blade back into Clamp B.
There is no foil to remove because the tool was used only to create pressure.

4.5. Cut the Outer Shape
Continue the project so the Fine-Point Blade cuts the finished outer shape.
If your Cricut Explore pushes the mat forward slightly before pulling it back in, gently support the mat and press it towards the rollers. Do not push hard. The goal is simply to help the rollers keep hold of the mat.
4.6. Check the Final Cut
Before unloading the mat, check that the outer shape has cut all the way through.
Lift a small edge of the cardstock while keeping the mat loaded. Repeat the cut if necessary.
Once the cut is complete, unload the mat.
4.7. Remove the Embossed Project
If you want to make more than one embossed element and reuse this stencil – do not roll the mat away from the cardstock.
Carefully remove the surrounding cardstock first.
Lift the finished embossed piece from the mat while trying to leave the thick stencil in place. Some curling may occur because you are lifting the paper away from the mat rather than bending the mat away from the paper.
The embossed outline should appear raised and clearly defined. Very small corners or intricate areas may be less crisp, but the larger sections should have a lovely embossed finish.
Optional: Reuse the Embossing Stencil
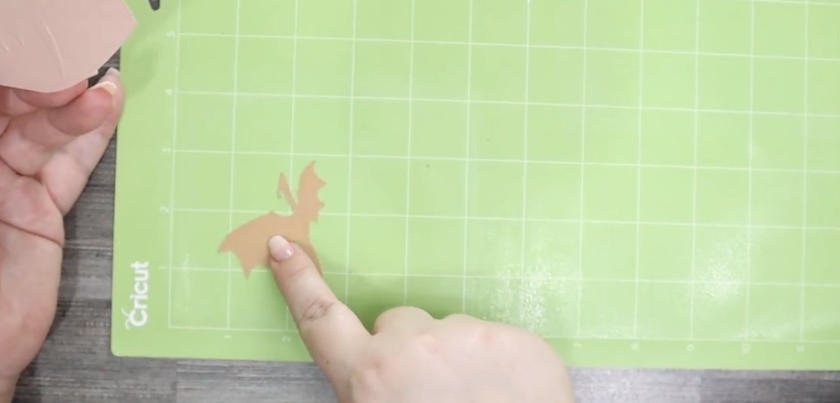
Leave the stencil attached to the mat if you would like to make more copies.
Place another piece of cardstock over the stencil, brayer it down, and repeat the embossing and cutting process.
The stencil can also be used with ink and a brush or sponge. Line the finished shape up with the stencil, hold it firmly in place, and gently apply ink through the opening.

Quick Recap
To emboss with your Cricut Explore machine, begin with a simple design and create a tiny offset around it in Cricut Design Space. Cut the main design from Kraft Board or 300gsm cardstock and leave it attached to a sticky StandardGrip Machine Mat.
Place 120gsm to 150gsm cardstock over the stencil and use the Bold Foil Transfer Tip to trace the offset without adding foil. Replace the tool with the Fine-Point Blade to cut the outer shape, then carefully remove your finished embossed project.