
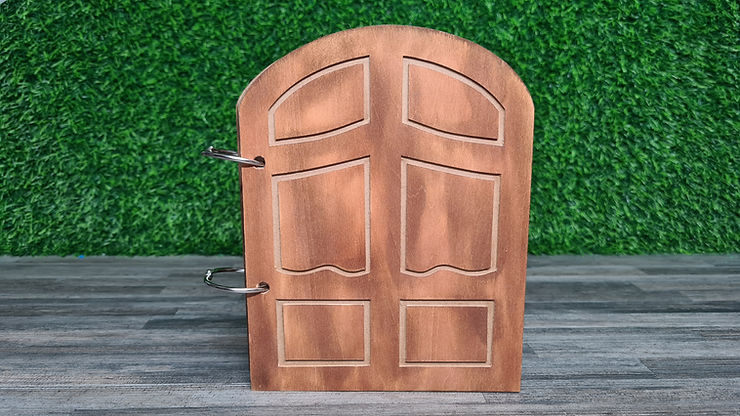
To be able to make intricate things like an ornate door Mini Album with my Cricut is one of the main reasons why I love this machine so much. This project brought me so much joy, and I hope it brings you some too!
This is what we will be learning to make in this tutorial, and please share pics of your end product with me too! I would love to see how yours comes out.

You can also follow along with the YouTube tutorial here:
All files will also be available to download here if you would like to use these files for personal use only. I make many of these kinds of tutorials over on my YouTube channel, so if you like this kind of thing, please subscribe, as it helps me out tremendously!
If you would like to support the channel, consider buying me a coffee or signing up to Patreon!
Buy me a Coffee
Join me on Patreon
Size guide: Sizing is totally up to you, the Cricut Basswood is 6” (15cm) wide, so I will be using a size of 5.75”/14.5cm so that it fits onto one piece.
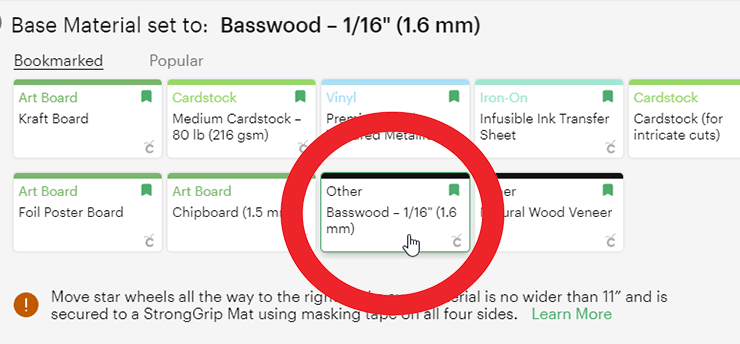
Material recommendation: Basswood/Balsa wood. I only have access to Basswood, so I have never tried Balsa wood before, but I believe it would work very similar to this. Another option is Wood veneer (to be cut with deep point blade), but you wouldn’t achieve the same look, as it is a lot thinner.
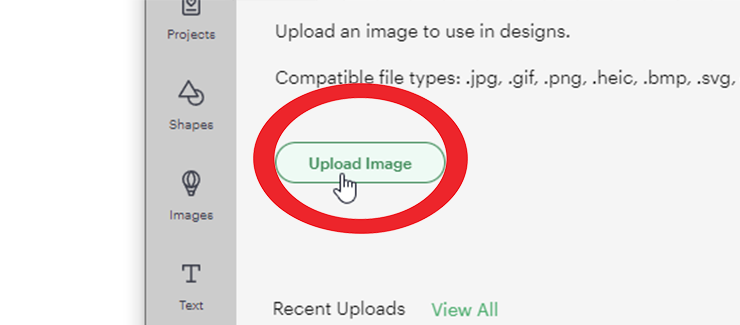
Once you have downloaded and saved the files, you will need to start off in a new canvas in Cricut Design Space, and click “Upload”

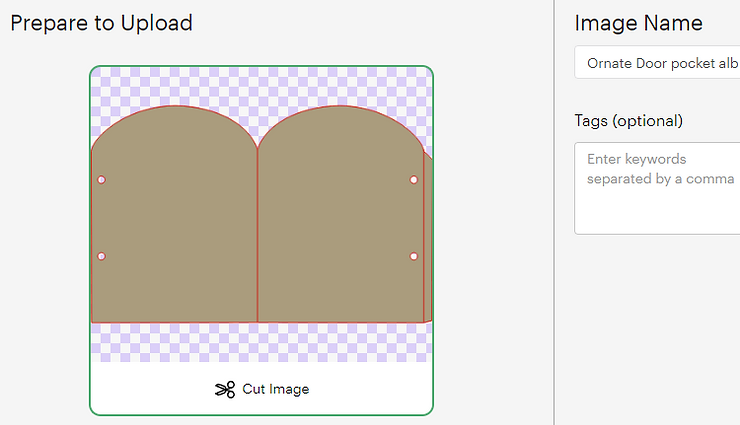
Find the file (named: Ornate Door top layer), and click Upload again, and add it to your canvas.
Next you can resize the file to Suit your needs, or use the size guide above.

Then it is time to hit Make it, and choose your cut setting. To cleanly cut through the basswood, first do your test cut on the basswood setting. I use the Art/Illustration board setting on my machine, as it has a few more passes with the same pressure.
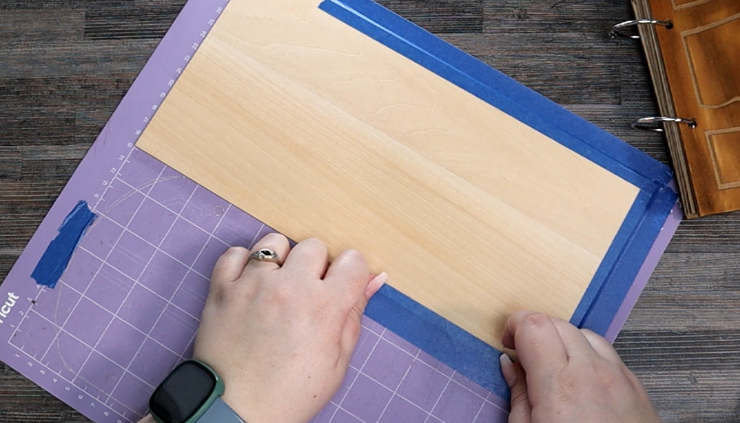
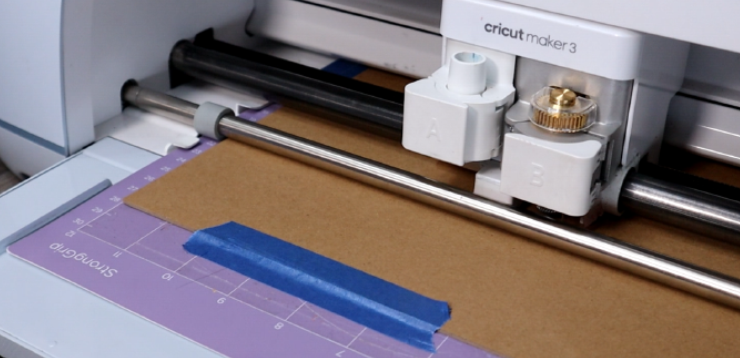
Use your strong grip mat, and painters tape to secure your basswood to your mat.
Move your star rollers to the side of your machine, and stay close while it is cutting to monitor any oopsies!

!NB! Don’t forget to cut 2 of these – one for each side!
Size Guide: This piece needs to be exactly the same size as the Ornate Door piece, as they stack on top of each other – so make sure they line up in size.
Material recommendation: There are two options of materials to use, one is another piece Basswood piece for the backing, however this doesnt give me the stability I like. I prefer to use Heavy Chipboard, as it is a little bit cheaper, and stronger to provide stability to the album.
You can either use the ready cut base file (named: ‘Ornate door base‘), or simply follow the below steps and learn to use the Contour feature in Cricut Design Space.
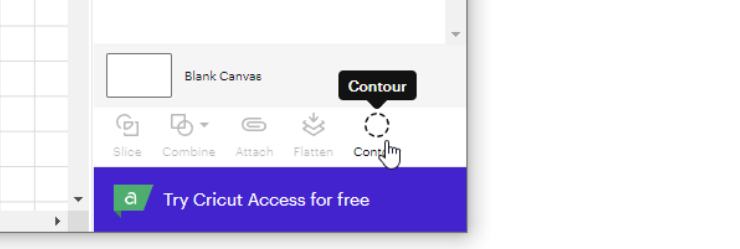
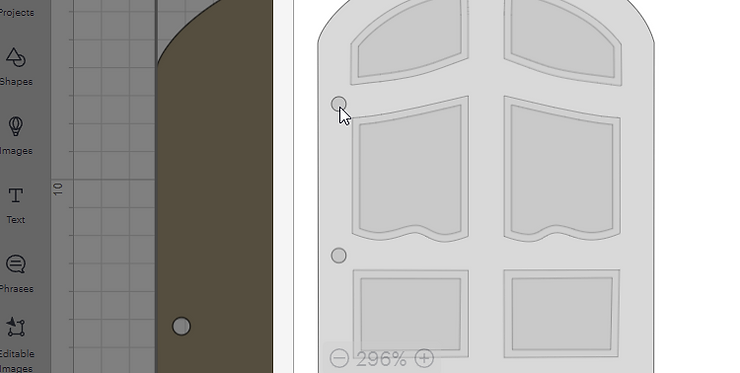
We can use the exact same design that you used with the basswood cover, and use the contour feature to remove the middle sections of the door design.
With your door selected, hit Contour in the bottom right of your screen.
Hit ‘Hide all contours’ to remove all of the sections of the design, you will be left with one solid shape – the outline of the door. The biggest shape always remains seen.
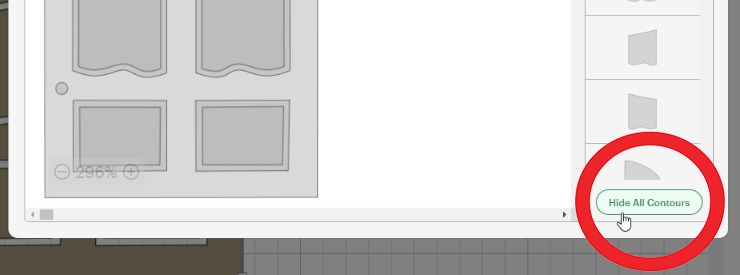
Remember to re-select the holes for the hinge, you can either click on the circles on the door, or select them from the panel on the right of your screen.
You are now all set and can cut your Heavy chipboard! Use the same steps as you did above for the Front section of the door (test cuts!!). Make sure to also tape your heavy chipboard down to your strong grip mat so that it doesn’t move while cutting.
You can now glue the two sections together, and use inks, paints, or stains if you want to colour your door!
I have included two files, one for pocket pages, and one for single pages. The single pages are easier to cut and require no guidance (and are more cost effective, as you can fit more on a single 12×12 page!). Below are instructions on how to use the pocket page file.
Size guide: I recommend this being double the size of the Ornate Door sections you have cut in order to have the pages slightly smaller than the doors.
Material recommendation: I use large pieces of 200lb/335gsm kraft board, so that I am able to cut three on a 12×24” mat. This I buy directly from paper suppliers, as I cannot find this size in a store. Otherwise you can use any cardstock at 12×12 size.
We are going to be using the file titled ‘Ornate door pocket album page’, so once that is uploaded, add it to your canvas.
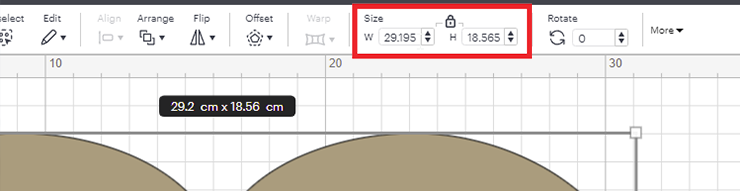
Adjust the sizing if necessary, I have cut mine at 29.2cm (11.5” – max width).
Select two layers that are just lines, these need to be changed otherwise they will cut.
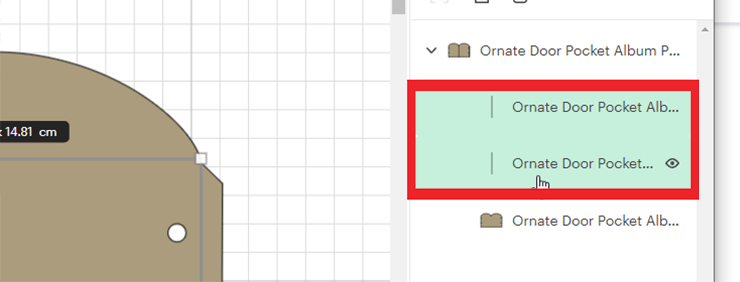
Change the vertical two lines from basic cut, to score.
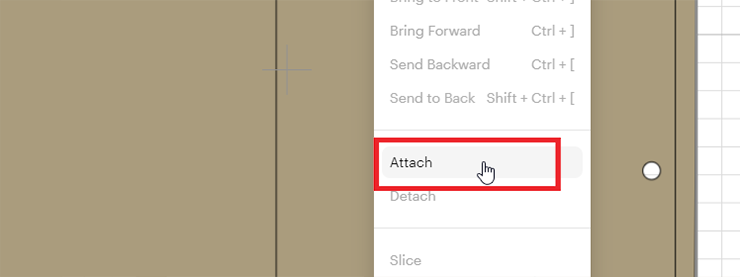
Select all the elements and hit ‘attach’
Cut however many pages you need to fill your album (I cut 6!), you can do this either on a 12×14” mat if you have longer pieces of kraft board, or one per 12×12 page.

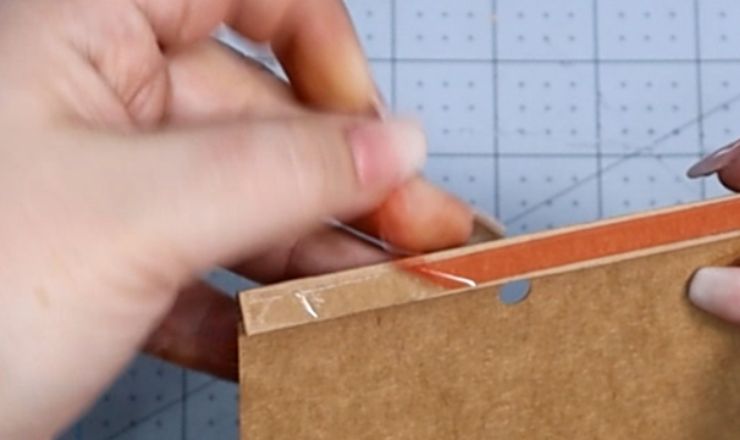
Fold on the score lines, and tape up the side strip on the outside section, and at the bottom if you want to create a pocket page.
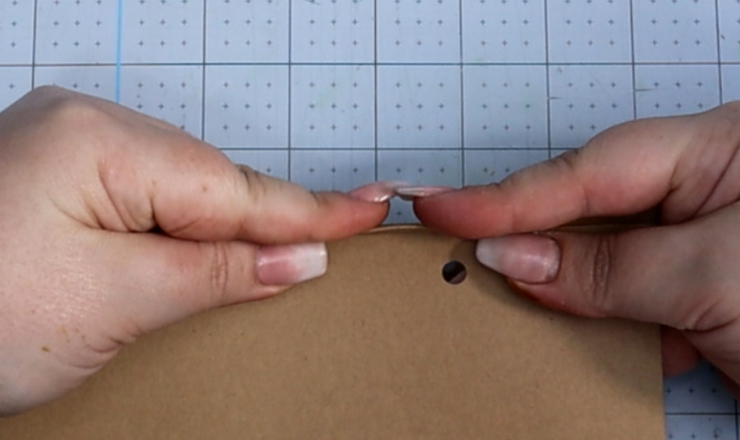
Remove a small section of the tape, line up the sides of the page, and press down. Then remove the rest of the tape.
Repeat on the rest of the pages, and you are done cutting everything and can start with the fun scrapbooking part!
You are now ready to put your entire album together and start creating something super awesome!
Note: This post may include some affiliate links, which in no way affect the price you pay, but I do earn a small commission from the order.