Getting started with your Cricut can be very intimidating. There is so much to learn, and we always want to start crafting straight away. But taking this super fun journey slowly, and step by step is the best thing you can do for yourself, and your crafting future.
This guide will help you with the basic steps you need to get started in your Cricut journey. From unboxing, to learning how to navigate Design Space, to getting started with your first Cricut project.
But please remember one thing – be kind to yourself on your journey. We don’t always get everything right the first time, and getting it wrong is totally ok!
If you don’t yet have a Cricut, there are many things that you can do and learn before purchasing your machine.
Here are a few things you can look at before getting your machine:
There are three different ranges of Cricut machine in the market at the moment. Each range of machine has their own strengths and downsides.
The Joy range of machines is small, portable and can cut a wide range of basic materials. These machines are the cheapest of the Cricut machines making them affordable, but also restrictive. Due to their size and lack of compatibility with other tools, your project options are limited. Only the Cricut Joy Xtra can make use of Print Then Cut.
The Explore range is a larger machine, cutting materials up to 12″/30.5cm wide. You have access to a wider range of tools like the scoring stylus, and can make a wider range of projects due to the size of materials you can use. You can cut a larger number of materials, and the machine is a little more expensive, but still very affordable.
The Maker range allows you access to more tools because of the drive housing they have. This range is the most versatile machine that Cricut offers, and can cut the widest range of materials. It has some of the most expensive machines in the range, and can allow you to make the widest variety of projects.
The Venture is a machine that is much larger and more expensive than the other machines, but due to its size allows you to create projects significantly larger than the rest. Although this is the largest machine in the range, the number of projects you can make is equal to the number of projects you can make as the Explore range.
If you would like to learn more about these machines, check out the below video on my YouTube Channel.
You don’t need to have already bought a Cricut in order to get started with Cricut Design Space. I normally recommend people to try out Design Space before buying their machine, so that they aren’t too intimidated when they get their first machine.
Download and install Cricut Design Space, create an account and start looking around and learn where things are so that you have an idea of what to do when you first get your machine.
While you learn the ins and outs of your brand new awesome machine, it is important to limit the number of different projects that you dive into.
There are so many different crafts that we can make with our Cricut machines. It is incredibly easy to get very excited about the possibilities that now lie before you. But, when learning a new craft, let’s say cardstock projects, there are a number of different things that can you need to learn to have successful projects.
I would suggest picking one specific type of craft to try and get comfortable with in the beginning. If you want to make stickers, I would suggest trying out several different sticker related projects before moving on to a different project type.
Not only does this limit the amount of material you need to buy, but it also limits the number of processes and different steps you need to learn in order to complete your first few projects. These initial projects help build your confidence, allowing you to advance quicker onto bigger and better things!
Whether you are brand new to your Cricut machine, or you want to re-look at the basics to ensure you haven’t missed anything, starting at the very beginning can be beneficial. It can lead you on the path to a much clearer understanding of how your Cricut works and allow you to more easily navigate the software.
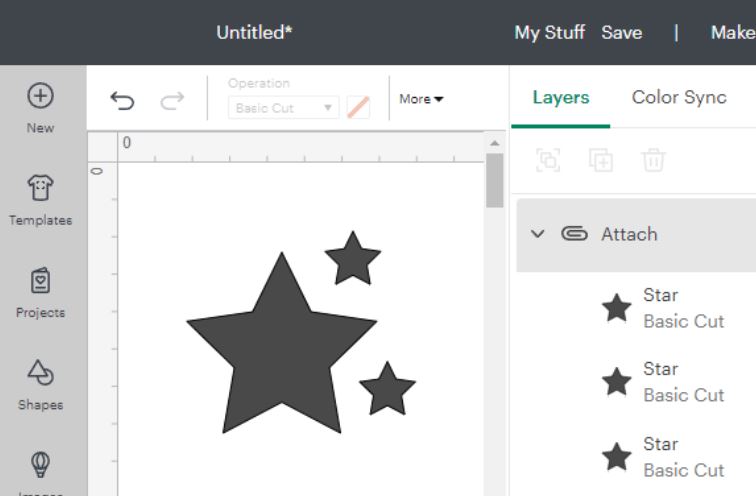
Used on different objects/layers to keep the same positioning on the canvas and the mat.
Attaching will turn all layers the same colour, so that they all fit on the same mat,
Tip: Often used to optimise space on the canvas, to save materials on your mat area.
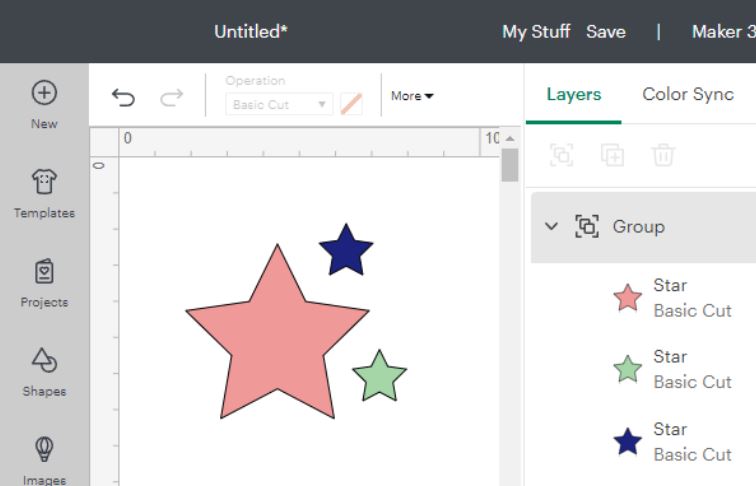
Used to keep them together while designing on the canvas.
Grouping will keep all layers different colours, so that they can be cut on different mats,
Tip: Use group to keep elements together to more easily see what your end project will look like once complete.
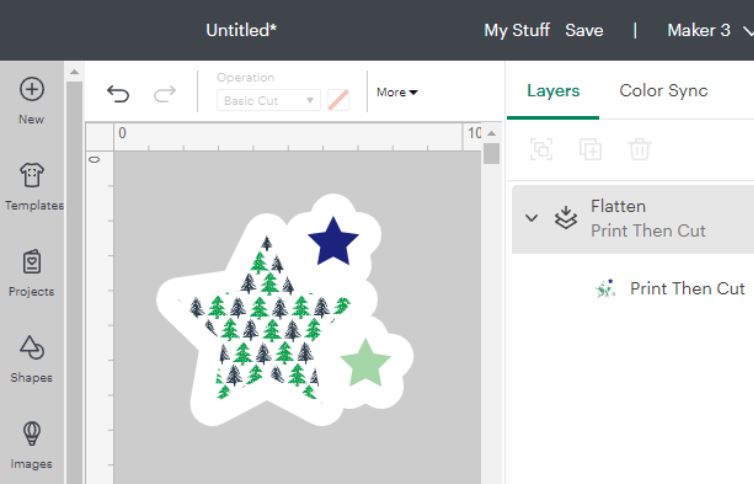
Used ONLY for Print Then Cut.
Combine multiple layers together to create a printable item. Background MUST be solid if you want to cut only the outline.
Offset is a great way of creating a solid background (cut line) for your printable item.
Tip: If you can see the grid lines of the canvas through your sticker – your background is not solid!